User:Pissachu/Hydroponics: Difference between revisions
imported>Pissachu No edit summary |
imported>Pissachu No edit summary |
||
| (25 intermediate revisions by the same user not shown) | |||
| Line 9: | Line 9: | ||
| [[File:Smellifer_Left.png||16px]][[File:Smellifer_Up.png||16px]][[File:Smellifer.png||16px]][[File:Smellifer.png||16px]][[File:Smellifer_Up.png||16px]][[File:Smellifer_Right.png||16px]] | | [[File:Smellifer_Left.png||16px]][[File:Smellifer_Up.png||16px]][[File:Smellifer.png||16px]][[File:Smellifer.png||16px]][[File:Smellifer_Up.png||16px]][[File:Smellifer_Right.png||16px]] | ||
| image = Smellifer.png | | image = Smellifer.png | ||
}} | }} <small>(not mobile friendly)</small> | ||
{{TOC}} | {{TOC}} | ||
| Line 25: | Line 25: | ||
I wonder what that yellow pin she's wearing is 🤔<br> | I wonder what that yellow pin she's wearing is 🤔<br> | ||
</div> | </div> | ||
[[File:Smellifer_hitting_kudzu.gif|128px|left]] | |||
[[File:Smellifer_hitting_kudzu.gif|128px|right]] | |||
[[File:Smellifer_hitting_kudzu.gif|128px|left]] | |||
[[File:Smellifer_hitting_kudzu.gif|128px|right]] | |||
[[File:Smellifer_hitting_kudzu.gif|128px|left]] | |||
[[File:Smellifer_hitting_kudzu.gif|128px|right]] | |||
[[File:Smellifer_hitting_kudzu.gif|128px|left]] | [[File:Smellifer_hitting_kudzu.gif|128px|left]] | ||
[[File:Smellifer_hitting_kudzu.gif|128px|right]] | [[File:Smellifer_hitting_kudzu.gif|128px|right]] | ||
| Line 43: | Line 49: | ||
Example Clippers Usage.gif.gif|The Plant Clippers to take a sample seed | Example Clippers Usage.gif.gif|The Plant Clippers to take a sample seed | ||
Example Hatchet Usage.gif.gif|Hatchet to harvest plants (especially tough ones) | Example Hatchet Usage.gif.gif|Hatchet to harvest plants (especially tough ones) | ||
Example Shovel Usage.gif|The Spade to kill | Example Shovel Usage.gif|The Spade if you want to kill the plant (sucks against kudzu) | ||
Smellifer.png|? | Smellifer.png|? | ||
</gallery> | </gallery> | ||
Since these are the base for most of the work, you'll want to have these items accessible at all times, meaning your belt.<br> | Since these are the base for most of the work, you'll want to have these items accessible at all times, meaning your belt.<br> | ||
<small><small><small><small>There are alternative tools to most of these, except for the mini hoe, it's up to you to find them![[File:Smellifer_Up.png|16px|link=https://github.com/space-wizards/space-station-14/blob/7b8d51ceb48adbd2d6d9ad5dcfa84486e8cb492c/Resources/Prototypes/Entities/Objects/Materials/shards.yml#L7|Github @ type: Sharp]]haha[[File:Smellifer_Up.png|16px|link:https=//github.com/space-wizards/space-station-14/blob/7b8d51ceb48adbd2d6d9ad5dcfa84486e8cb492c/Resources/Prototypes/Entities/Objects/Tools/tools.yml#L12|Github @ tags: PlantSampleTaker]]haha[[File:Smellifer_Up.png|16px|link:https://github.com/space-wizards/space-station-14/blob/e830ccebe5a58623315e497e5f449b74333304d3/Resources/Prototypes/Entities/Objects/Tools/tools.yml#L481|Github @ type: Shovel]]</small></small></small></small><br> | <small><small><small><small>There are alternative tools to most of these, except for the mini hoe, it's up to you to find them![[File:Smellifer_Up.png|16px|link=https://github.com/space-wizards/space-station-14/blob/7b8d51ceb48adbd2d6d9ad5dcfa84486e8cb492c/Resources/Prototypes/Entities/Objects/Materials/shards.yml#L7|Github @ type: Sharp]]haha[[File:Smellifer_Up.png|16px|link:https=//github.com/space-wizards/space-station-14/blob/7b8d51ceb48adbd2d6d9ad5dcfa84486e8cb492c/Resources/Prototypes/Entities/Objects/Tools/tools.yml#L12|Github @ tags: PlantSampleTaker]]haha[[File:Smellifer_Up.png|16px|link:https://github.com/space-wizards/space-station-14/blob/e830ccebe5a58623315e497e5f449b74333304d3/Resources/Prototypes/Entities/Objects/Tools/tools.yml#L481|Github @ type: Shovel]]</small></small></small></small><br> | ||
The plants grow on their own | The plants grow on their own, all you have to do is wait and make sure they have water and nutriment.<br> | ||
THAT'S ALL.<br> | |||
This guide requires at least a little knowledge in the [https://heurl.in/ss14/recipes Kitchen Roles] and in [[Chemistry]] | |||
{{clear}} | {{clear}} | ||
= Hydroponics layout = | = Hydroponics layout = | ||
<div style="text-align:center; color:red"> | <div style="text-align:center; color:red; font-weight:bold"> <big>The boring stuff starts here</big> </div> | ||
Because you want your trays available to you at all times to check on the plants, you'll probably want them to be close and visible. | Because you want your trays available to you at all times to check on the plants, you'll probably want them to be close and visible. | ||
Unfortunately not all stations have a well put hydroponics department on that regard;<br> | Unfortunately not all stations have a well put hydroponics department on that regard;<br> | ||
| Line 83: | Line 90: | ||
: I never let this happen to me.<br> | : I never let this happen to me.<br> | ||
: As you can see, the equipment is all over the place, most of the seeds and produce are indistinguishable from each other (you could never tell if they got swabbed, mutated or anything else unless you memorised where you kept them), someone left a full belt and multiple various tools on the ground;<br> | : As you can see, the equipment is all over the place, most of the seeds and produce are indistinguishable from each other (you could never tell if they got swabbed, mutated or anything else unless you memorised where you kept them), someone left a full belt and multiple various tools on the ground;<br> | ||
: the novice botanist that made themselves a diona character to try and RP even drank all the Robust Harvest and polymorphed into a tree[[File:Smellifer_Up.png|16px|link=https://github.com/space-wizards/space-station-14/blob/7b8d51ceb48adbd2d6d9ad5dcfa84486e8cb492c/Resources/Prototypes/Reagents/botany.yml#L150|Github @ Resources/Prototypes/Reagents/botany.yml|]].<br> | : the novice botanist that made themselves a diona character to try and RP even drank all the Robust Harvest and polymorphed into a tree[[File:Smellifer_Up.png|16px|link=https://github.com/space-wizards/space-station-14/blob/7b8d51ceb48adbd2d6d9ad5dcfa84486e8cb492c/Resources/Prototypes/Reagents/botany.yml#L150|Github @ Resources/Prototypes/Reagents/botany.yml Line 150|]].<br> | ||
: What's in that puddle?<br> | : What's in that puddle?<br> | ||
: Now, I want you to look well at the gif, open it in another page too if you need, and zoom really well into it:<br> | : Now, I want you to look well at the gif, open it in another page too if you need, and zoom really well into it:<br> | ||
| Line 91: | Line 98: | ||
[[File:Smellifer_Right.png||16px]]'''Where's Waldo?'''[[File:Smellifer_Left.png||16px]] | [[File:Smellifer_Right.png||16px]]'''Where's Waldo?'''[[File:Smellifer_Left.png||16px]] | ||
</div> | </div> | ||
| | |}<br> | ||
{| class="wikitable" style="margin:auto" | |||
| [[File:Hydroponics_Department_Clean.png|512px]] | | [[File:Hydroponics_Department_Clean.png|512px]] | ||
| | | | ||
| Line 108: | Line 116: | ||
|} | |} | ||
<small><pre>Tip: Want to know where to find how many Botanists are gonna be allowed onto one specific station? | <small><pre>Tip: Want to know where to find how many Botanists are gonna be allowed onto one specific station? The Smellifer down here tells you the path in the Github!</pre></small> | ||
[[File:Smellifer_Up.png|64px|https://github.com/space-wizards/space-station-14/tree/fb38bf3d240404970e3db6f8ca1c5cb5174fbe95/Resources/Prototypes/Maps|Github @ Resources/Prototypes/Maps|center]] | [[File:Smellifer_Up.png|64px|link=https://github.com/space-wizards/space-station-14/tree/fb38bf3d240404970e3db6f8ca1c5cb5174fbe95/Resources/Prototypes/Maps|Github @ Resources/Prototypes/Maps|center]] | ||
<div style="text-align:center; color:red"> | <div style="text-align:center; color:red; font-weight:bold"> <big>The boring stuff ends here</big> </div> | ||
= [[File:Smellifer_Right.png|16px]] Slightly Advanced Plant Genetics [[File:Smellifer_Left.png|16px]] = | = [[File:Smellifer_Right.png|16px]] Slightly Advanced Plant Genetics [[File:Smellifer_Left.png|16px]] = | ||
With {{Item|plant clippers|label=clipping}} and using the {{Item|seed extractor}} being the most basic form of Plant Genetic Engineering, anything more intrusive with what you see on the seed can be considered Advanced Plant Genetics.<br> | With {{Item|plant clippers|label=clipping}} and using the {{Item|seed extractor}} being the most basic form of Plant Genetic Engineering, anything more intrusive with what you see on the seed can be considered Advanced Plant Genetics.<br> | ||
[[File:Example Seed Inspection.png]] | With these we're able to obtain the seeds of the plants:<br> | ||
[[File:Example Seed Inspection.png]]<br> | |||
The two "genes" that are always visible to us are Yield and Potency (out of a couple dozen more[[File:Smellifer.png|16px|link=https://github.com/space-wizards/space-station-14/blob/d0b0a4a92611663bdb76150488e4908cc27cffaf/Content.Server/Botany/SeedPrototype.cs|Github @ Content.Server/Botany/SeedPrototype.cs]]) | |||
* Yield influences how many pieces of "fruit" or "produce" come out when you harvest the plant (example: wheat has 3 yield, so 3 pieces of wheat will come out) | |||
* Potency influences the amount of chemicals each piece of produce will contain (and the size of them [[File:Smellifer.png|16px|link=https://github.com/space-wizards/space-station-14/blob/020f25139c7a3e22bd80f7936efe5debae861e51/Content.Client/Botany/Components/PotencyVisualsComponent.cs|Github @ Content.Client/Botany/Components/PotencyVisualsComponent.cs]]); the individual amounts can be calculated using the Min, Max and PotencyDivisor values in the seeds.yml file [[File:Smellifer_Up.png|16px|link=https://github.com/space-wizards/space-station-14/blob/9d32e7db4ea8a5d5f35cc5f0dcf9980159b14ca0/Resources/Prototypes/Hydroponics/seeds.yml|Github @ Resources/Prototypes/Hydroponics/seeds.yml]] | |||
== Proper Use of Robust Harvest == | == Proper Use of Robust Harvest == | ||
{{reagent card|Robust Harvest}} | |||
While being really useful, Robust Harvest also has a couple of BIG downsides; above are all of its effects, summarised here below: | |||
* every 1u of Robust Harvest adds +3 to the plant's Potency gene | |||
* can only make the plant reach a maximum of 50 potency | |||
* any +1 to the plant's potency that tries to go over 50 has a 1 in 10 chance of decreasing yield by 1 [[File:Smellifer_Up.png|16px|link=https://github.com/space-wizards/space-station-14/blob/dc86665c2420549ddc3402d831576c40940d52fb/Content.Server/EntityEffects/EntityEffectSystem.cs#L492|Github @ Content.Server/EntityEffects/EntityEffectSystem.cs Line 492]] | |||
* if it makes the plant reach 30 potency, or is used on a plant that already has 30 potency, it gives it the Seedless gene | |||
You don't always need to use (waste) Robust Harvest:<br> | |||
→ Will the chef (or chemist) put the produce into a {{Item|microwave}}? '''DON'T FUCKING USE IT'''<br> | |||
→ Will the chemist (or chef) put the produce into a {{Item|industrial reagent grinder|label=reagent grinder}}? Then it's fine. | |||
{| style="font-family: monospace; border:1px solid #BBB" width="100%" | |||
|- | |||
| align="left" style="color:red" | WARNING || align="center" style="font-size:125%" | The tray is a container with a volume of 200 units || align="right" style="color:red" | WARNING | |||
|- | |||
| align="left" style="color:red" | WARNING || align="center" style="font-size:125%" | It needs time before the plant is able to absorb the chemicals you put into it || align="right" style="color:red" | WARNING | |||
|- | |||
| align="left" style="color:red" | WARNING || align="center" style="font-size:125%" | If you put in 15u of Robust Harvest, wait at least 15 '''* 3''' seconds before clipping || align="right" style="color:red" | WARNING | |||
|- | |||
| align="left" style="color:red" | WARNING || align="center" style="font-size:125%" | This same rule applies for everything else, including any produce you compost into it || align="right" style="color:red" | WARNING | |||
|- | |||
| align="left" style="color:red" | WARNING || align="center" style="font-size:125%" | This way, you won't risk wasting chemicals that the seed you sampled didn't have time to absorb || align="right" style="color:red" | WARNING | |||
|} | |||
<small><pre>Tip: if the tray has only 10u of Robust Harvest, it will absorb in 3 seconds 1u of Robust Harvest; | |||
if instead there are 10u of Robust Harvest and 10u of water, it will still absorb in 3 seconds 1u of Robust Harvest AND 1u of water</pre></small> | |||
== Introduction to Swabbing == | == Introduction to Swabbing == | ||
<center>Welcome to the great<br> | |||
<span style="font-weight:bold; color:green; font-size:20px">Hydro Tray Casino</span>.<br></center> | |||
<gallery style="text-align:center"> | |||
Example Swabbing.gif | |||
Example Swabbing.gif | |||
Example Swabbing.gif | |||
Example Swabbing.gif | |||
Example Swabbing.gif | |||
</gallery> | |||
The mechanic is very simple: the swab is a container for copied "genes" (or "traits") that a plant has; taking the image above as an example, swabbing the cocoa copies its traits, then swabbing the tomatoes puts a random set of those traits onto the tomatoes, "cleans" the swab and copies onto the swab the tomato plant's traits from '''before''' it was swabbed.<br> | |||
More in the specific, there are 2 situations[[File:Smellifer_Left.png|16px|link=https://github.com/space-wizards/space-station-14/blob/d9f125787e64e5931ed210083611bc0210311089/Content.Server/Botany/Systems/BotanySwabSystem.cs#L63|Github @ Content.Server/Botany/Systems/BotanySwabSystem.cs Line 63]]: | |||
<ol> | |||
<li>'''You use a clean swab onto a plant:''' the swab is empty of traits, so it will only take random ones from the plant it's being used on without passing any</li> | |||
<li>'''The swab has already been used before:''' the plant's traits and the swab's traits will be used to create a third set of mix and match traits that the plant will inherit; the swab will then be cleaned and take the traits the plant had before this cross pollination</li> | |||
A list of traits that get passed with crossing can be found here [[File:Smellifer_Right.png|16px|link=https://github.com/space-wizards/space-station-14/blob/master/Content.Server/Botany/Systems/MutationSystem.cs#L60|Github @ Content.Server/Botany/Systems/MutationSystem.cs Line 60]]; the decision of which trait to take between the swab's and the plant's is always a 50-50 choice | |||
</ol> | |||
With that said, it's pretty obvious that swabbing isn't a precise instrument if you want to copy something specific.<br> | |||
=== The Most Powerful Tool to Your Arsenal === | <center><small><pre>The rule of thumb is to use 5 (or 4 if I'm feeling lazy) swabs if I want to fully copy a plant onto another; while it's not a 100% certainty, it's been a number that worked ever since I was taught swabbing methnanas by Nilk, and the times it required more swabbing can be counted on one hand</pre></small></center> | ||
As a last thing, swabbing two plants that aren't of the same type (meaning for example poppies with something other than poppies) has a 7 in 10 chance of giving the swabbed plant the Seedless gene ([[File:Smellifer_Up.png|16px|link=https://github.com/space-wizards/space-station-14/blob/master/Content.Server/Botany/Systems/MutationSystem.cs#L100|Github @ Content.Server/Botany/Systems/MutationSystem.cs Line 100]] Hybrids have a high chance of being seedless) | |||
{| style="font-family: monospace; border:1px solid #BBB" width="100%" | |||
|- | |||
| align="left" style="color:red" | WARNING || align="center" style="font-size:125%" | The standard chemicals contained in cocoa pods are just vitamin and nutriment || align="right" style="color:red" | WARNING | |||
|- | |||
| align="left" style="color:red" | WARNING || align="center" style="font-size:125%" | Chemicals are a trait or gene that can get passed down during swabbing || align="right" style="color:red" | WARNING | |||
|- | |||
| align="left" style="color:red" | WARNING || align="center" style="font-size:125%" | If you plan on obtaining e.g. 6 Yield Ambrosia Deus through swabbing cocoa || align="right" style="color:red" | WARNING | |||
|- | |||
| align="left" style="color:red" | WARNING || align="center" style="font-size:125%" | You might stay there for the entire shift || align="right" style="color:red" | WARNING | |||
|} | |||
=== <u>{{item|ClothingBackpackDuffelHydroponics|label=}}[[File:Scott's 6 Yield Cocoa Seeds.png|32px]] The Most Powerful Tool to Your Arsenal [[File:Scott's 6 Yield Cocoa Seeds.png|32px]]{{item|ClothingBackpackDuffelHydroponics|label=}}</u> === | |||
When the chef, or cargo, or anybody else start asking botany for plants, an efficient thing you might think about is giving every plant you can the 6 yield from cocoa;<br> | |||
what most players do after learning how to swab is one of two things:<br> | |||
#They either only use one swab, to transmit potency or yield or whatever else, and hope that it will be the one that works<br> | |||
#They start using an arbitrary number of swabs to increase their chances through numbers (see section above)<br> | |||
While the second choice isn't exactly wrong, you have to remember that there are only 30 {{item|DiseaseSwab|label=swabs}} in a swab box, 1 swab box in a {{item|Nutrimax}}, and 1 box for each {{item|LockerBotanist|label=Hydroponics locker}} on station<br> | |||
It's not an item you might encounter a drought of very often, but it's still best to keep in mind that it's a finite resource (that most people wouldn't go to great lengths to replace)<br> | |||
A second, ''much more important'' point that I make is the following:<br> | |||
[[File:MultiSwab.gif]]<br> | |||
(ignoring how we're swabbing 3 corn plants instead of 1 to then clip it) if you have to swab multiple plants to have more produce with fewer harvests, it's a gigantic fucking chore having to swab multiple plants 4 to 5 times each, ''one at a time''<br> | |||
Here I present to you the humble {{item|ClothingBackpackDuffelHydroponics}} (2 in each {{item|HyDrobe}}):<br> | |||
[[File:Scott's 6 Yield Cocoa Seeds.png]]<br> | |||
Instead of using multiple swabs with just 1 cocoa plant, you only use 1 swab with multiple cocoa plants: | |||
<ol> | |||
<li>at the start of the shift you plant 1 or 2 cocoa plants (preferrably near the {{item|seed extractor}})</li> | |||
<li>you fill a {{item|ClothingBackpackDuffelHydroponics}} with all of them (any excess is still welcome)</li> | |||
<li>whenever you want to give 6 yield to a plant (or multiple) you do this little dance down below:</li> | |||
[[File:SingleSwab.gif]]<br> | |||
using 4-5 cocoa seeds for each plant, you switch the concept of "clean" and "used" from the swabs to the seeds<br><br> | |||
The exact succession of events is this:<br> | |||
⬇️ you put nearby 4-5 seeds per each plant to give 6 yield to<br> | |||
⬇️ you plant 1 cocoa seed per each plant to give 6 yield to<br> | |||
⬇️ you use the swab on a cocoa plant, then on the plant to give 6 yield to, then on another cocoa plant, then on another plant to give 6 yield to, and so on until you've done each plant<br> | |||
⬇️ you kill all of the cocoa plants<br> | |||
🔄️ you repeat from the start | |||
</ol> | |||
== Warnings for Seed Extraction == | == Warnings for Seed Extraction == | ||
{| style="font-weight:bold" width="100%" | |||
|- | |||
| align="left" style="font-size:125%" | {{Item|Seed Extractor|label=Seed Extractor}} || | |||
| align:center style="font-size:125%" | VS || | |||
| align="right" style="font-size:125%" | {{Item|Plant Clippers|label=Plant Clippers}} | |||
|} | |||
<center><small><pre>As a rule of thumb, only resort to the Seed Extractor when you're completely sure that the plant can produce seeds; every tool that isn't one of the 4 basic ones could lead to making the plant gain the Seedless gene</pre></small></center> | |||
For nearly every situation in which I need to have a plant's seeds, I use the {{Item|plant clippers}} to always keep a backup of the plant; if no backup is taken and the plant dies, the problem varies based on how you handled the plant: | |||
*Was it a normal plant that you didn't mess about with? | |||
**You're one step closer to having to ask cargo for new seeds, which could take 15 minutes up to the end of the shift. | |||
*Was it a really good mutated plant, or a plant in which you put ungodly amounts of Robust Harvest, or, more in general, a plant that you can't obtain again without spending more time and more resources? | |||
**You likely now realise the mistake you made. | |||
In both of these cases, there is always the possibility that the plant still doesn't have the Seedless gene (in case of the mutation, maybe it gained it and lost it); consider these miracles, a green eye in the sky winking before looking away, and therefore unreliable. | |||
<p> <span style="font-weight:bold; color:red">IMPORTANT:</span> | |||
<span style="font-weight:bold">WHEN TO CLIP</span><br> | |||
🟥 Right after you plant the seed (<span style="font-weight:bold">it won't clip</span>)<br> | |||
🟥 The plant is mature but still without fruit (<span style="font-weight:bold">the plant coming from the seed will start already with very low health</span>)<br> | |||
🟩 The green ("ready for harvest") light is blinking <br> | |||
</p> | |||
[[File:Example Clippers Usage.gif.gif]]<br> | |||
Notes on clipping: | |||
* clipping a plant decreases its health, and although a plant's health is easy to recover with the right know-how, you never know if you might want to keep the plant living a little while or clip it to death | |||
* every single time you clip a plant, there's a random 3 in 10 chance that the plant won't be able to be clipped again; this makes it possible to always have 1 seed, but you might have to replant and retry if you want more backups [[File:Smellifer_Up.png|16px|link=https://github.com/space-wizards/space-station-14/blob/81aef0fb1c6f3bd232238a2af9844327b27c8a80/Content.Server/Botany/Systems/PlantHolderSystem.cs#L311|Github @ Content.Server/Botany/Systems/PlantHolderSystem.cs Line 311]] | |||
= [[File:Smellifer_Left.png|16px]] More Advanced Plant Genetics [[File:Smellifer_Right.png|16px]] = | = [[File:Smellifer_Left.png|16px]] More Advanced Plant Genetics [[File:Smellifer_Right.png|16px]] = | ||
<small><pre>To do: make a short list about all of the plant's "genes" (and which ones are important)</pre></small> | |||
<small><pre>To do: preface with saying how botany can be problematic because the engine doesn't like how you can produce thousands of the same object in half an hour (example being the Bioluminescence mutation)</pre></small> | |||
== Mutations and their related chemicals == | == Mutations and their related chemicals == | ||
<small><pre>To do: make a short list about most mutations (and which ones are important)</pre></small> | |||
<small><pre>To do: talk about mutations transform plants in other ones, link the seeds.yml with mutationPrototypes</pre></small> | |||
=== Mutagen === | === Mutagen === | ||
{{reagent card|Unstable Mutagen}} | |||
<small><pre>To do: talk about composting and how it affects random ticks for some mutations (e.g. kudzu and death gene's effects acceleration, gas exhuding)</pre></small> | |||
<small><pre>To do: talk about how plants that have had genes modified, keep all of those modifications when they transform into other plants through mutation (e.g. giving ambrosia vulgaris 6 yield before mutating into ambrosia deus will get deus with 6 yield + omnizine)</pre></small> | |||
=== Left-4-Zed === | === Left-4-Zed === | ||
{{reagent card|Left-4-Zed}} | |||
=== Phalanximine === | === Phalanximine === | ||
{{reagent card|Phalanximine}} | |||
=== Dylovene, Cryoxadone, Necrosol? === | === Dylovene, Cryoxadone, Necrosol? === | ||
{{reagent card|Dylovene}} {{reagent card|Cryoxadone}} {{reagent card|Necrosol}} | |||
=== Sedin? === | |||
{{reagent card|Sedin}} | |||
= Perfect Preparation 🌿 = | = Perfect Preparation 🌿 = | ||
<small><pre>To do: round start, plant 1 or 2 cocoa, fill up a duffel, give the cocoa plant(s) 15u of Robust Harvest to get to 46 potency; get a bucket, put 1u of radium from the ChemistryKit, put every EZ Nutrient in the Nutrimax, find any more EZ Nutrient the station might have nearby (Fland has 2 Hydro Equipment Crates) to add; find a screwdriver and wirecutters and cut the Manager wire on the Nutrimax to get the 30u bottle of Mutagen and the 30u bottle of Left-4-Zed; blitz mutating; the importance of Phalanx in this case</pre></small> | |||
<small><pre>To do: talk about composting produce with high potency and how it affects both the Nutriment of a tray and the plant's health</pre></small> | |||
= [[File:Smellifer_Left.png|16px]] References [[File:Smellifer_Left.png|16px]] = | = [[File:Smellifer_Left.png|16px]] References [[File:Smellifer_Left.png|16px]] = | ||
| Line 143: | Line 285: | ||
: Through this API: https://www.postman.com/juliangiebel/ss14-mapserver/request/qgje53r/get-map-map-guid | : Through this API: https://www.postman.com/juliangiebel/ss14-mapserver/request/qgje53r/get-map-map-guid | ||
* Shots of [[File:Smellifer.png|16px]] performing tasks were done with a localhost server through the steps in https://docs.spacestation14.com/en/general-development/setup/server-hosting-tutorial.html, using ShareX as the capture software for the gifs | * Shots of [[File:Smellifer.png|16px]] performing tasks were done with a localhost server through the steps in https://docs.spacestation14.com/en/general-development/setup/server-hosting-tutorial.html, using ShareX as the capture software for the gifs | ||
* <pre>Botanist | | * <pre>Botanist | 553H</pre> | ||
* [[File:HydroPerfection.webp]] | |||
<references/> | <references/> | ||
<br> | <br> | ||
''Signed [[User:Pissachu]] ([[User talk:Pissachu|talk]])'' | ''Signed [[User:Pissachu]] ([[User talk:Pissachu|talk]])'' | ||
Latest revision as of 15:39, 21 August 2025


Template:Callout (not mobile friendly)
Small Note of Attention:
While I know that, as the game gets updated more, most of the liquid content in this page won't matter anymore, I still think this guide is useful enough if anybody wants to learn any protocols more advanced than taking random seeds, planting them, then leaving Hydroponics to tide.
 Introduction


Hello.
This here is Smellifer.

You probably haven't seen her yet in this page, so let's get acquainted first.
I wonder what that yellow pin she's wearing is 🤔

The first thing I want to clear out is how you tend to a plant whenever it's inside a hydroponics tray
Once you put the seed in the tray, there are only 4 tools you really need:
-
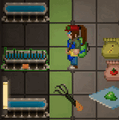 The Mini Hoe to remove weeds
-
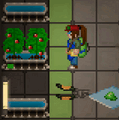 The Plant Clippers to take a sample seed
-
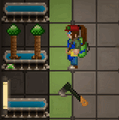 Hatchet to harvest plants (especially tough ones)
-
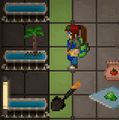 The Spade if you want to kill the plant (sucks against kudzu)
-
 ?


Since these are the base for most of the work, you'll want to have these items accessible at all times, meaning your belt.
There are alternative tools to most of these, except for the mini hoe, it's up to you to find them! haha
 haha
The plants grow on their own, all you have to do is wait and make sure they have water and nutriment.
THAT'S ALL.
This guide requires at least a little knowledge in the Kitchen Roles and in Chemistry
Hydroponics layout
Because you want your trays available to you at all times to check on the plants, you'll probably want them to be close and visible.
Unfortunately not all stations have a well put hydroponics department on that regard;
always having a wrench on you to throw at furniture to displace it wherever you want is a nice additional tool to the arsenal.
Tip: always keep a sort of path uninterrupted by machines, especially trays, so that you always have some space to put things on the floor next to the trays for special operations; to have a good idea of what I mean, think of it as if your player has to be able to walk without tripping on the trays or other furniture.
Layout Examples
 Oasis has a very basic layout (if not for the number of botanists available |
 On the other hand, as full of resources as it may be, I find that Cog's is too big and too separated, the two trays behind the pillar are hard to access and you need to run around the main section like a kid on adderall to access the whole thing if your developments call for more trays. |
Tip: having the department floor and furniture filled with trash or tools left laying around can lead to confusion when trying to find an important item you need for something specific.
While I cannot give you physiologic proof of your brain getting confused by all the small things it's looking at, trying to distinguish them one by one, I can show you some proof of concept below:

|
|

|
specifically for default cocoa seeds, the key to my success, to swab 6 yield into other plants |
Tip: Want to know where to find how many Botanists are gonna be allowed onto one specific station? The Smellifer down here tells you the path in the Github!

Slightly Advanced Plant Genetics
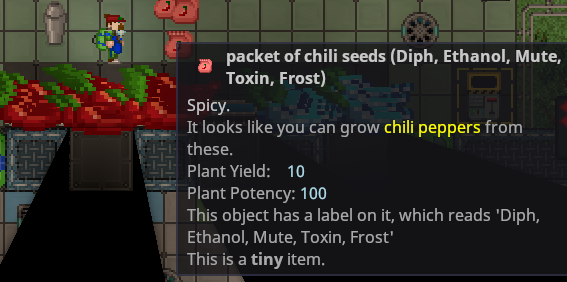
With plant clippers and using the seed extractor being the most basic form of Plant Genetic Engineering, anything more intrusive with what you see on the seed can be considered Advanced Plant Genetics.
With these we're able to obtain the seeds of the plants:

The two "genes" that are always visible to us are Yield and Potency (out of a couple dozen more )
- Yield influences how many pieces of "fruit" or "produce" come out when you harvest the plant (example: wheat has 3 yield, so 3 pieces of wheat will come out)
- Potency influences the amount of chemicals each piece of produce will contain (and the size of them ); the individual amounts can be calculated using the Min, Max and PotencyDivisor values in the seeds.yml file
Proper Use of Robust Harvest
Template:Reagent card While being really useful, Robust Harvest also has a couple of BIG downsides; above are all of its effects, summarised here below:
- every 1u of Robust Harvest adds +3 to the plant's Potency gene
- can only make the plant reach a maximum of 50 potency
- any +1 to the plant's potency that tries to go over 50 has a 1 in 10 chance of decreasing yield by 1
- if it makes the plant reach 30 potency, or is used on a plant that already has 30 potency, it gives it the Seedless gene
You don't always need to use (waste) Robust Harvest:
→ Will the chef (or chemist) put the produce into a microwave? DON'T FUCKING USE IT
→ Will the chemist (or chef) put the produce into a industrial reagent grinder? Then it's fine.
| WARNING | The tray is a container with a volume of 200 units | WARNING |
| WARNING | It needs time before the plant is able to absorb the chemicals you put into it | WARNING |
| WARNING | If you put in 15u of Robust Harvest, wait at least 15 * 3 seconds before clipping | WARNING |
| WARNING | This same rule applies for everything else, including any produce you compost into it | WARNING |
| WARNING | This way, you won't risk wasting chemicals that the seed you sampled didn't have time to absorb | WARNING |
Tip: if the tray has only 10u of Robust Harvest, it will absorb in 3 seconds 1u of Robust Harvest;
if instead there are 10u of Robust Harvest and 10u of water, it will still absorb in 3 seconds 1u of Robust Harvest AND 1u of water
Introduction to Swabbing
Hydro Tray Casino.

The mechanic is very simple: the swab is a container for copied "genes" (or "traits") that a plant has; taking the image above as an example, swabbing the cocoa copies its traits, then swabbing the tomatoes puts a random set of those traits onto the tomatoes, "cleans" the swab and copies onto the swab the tomato plant's traits from before it was swabbed.
More in the specific, there are 2 situations:
- You use a clean swab onto a plant: the swab is empty of traits, so it will only take random ones from the plant it's being used on without passing any
- The swab has already been used before: the plant's traits and the swab's traits will be used to create a third set of mix and match traits that the plant will inherit; the swab will then be cleaned and take the traits the plant had before this cross pollination A list of traits that get passed with crossing can be found here
; the decision of which trait to take between the swab's and the plant's is always a 50-50 choice
With that said, it's pretty obvious that swabbing isn't a precise instrument if you want to copy something specific.
The rule of thumb is to use 5 (or 4 if I'm feeling lazy) swabs if I want to fully copy a plant onto another; while it's not a 100% certainty, it's been a number that worked ever since I was taught swabbing methnanas by Nilk, and the times it required more swabbing can be counted on one hand
As a last thing, swabbing two plants that aren't of the same type (meaning for example poppies with something other than poppies) has a 7 in 10 chance of giving the swabbed plant the Seedless gene ( Hybrids have a high chance of being seedless)
| WARNING | The standard chemicals contained in cocoa pods are just vitamin and nutriment | WARNING |
| WARNING | Chemicals are a trait or gene that can get passed down during swabbing | WARNING |
| WARNING | If you plan on obtaining e.g. 6 Yield Ambrosia Deus through swabbing cocoa | WARNING |
| WARNING | You might stay there for the entire shift | WARNING |
ClothingBackpackDuffelHydroponics The Most Powerful Tool to Your Arsenal ClothingBackpackDuffelHydroponics
When the chef, or cargo, or anybody else start asking botany for plants, an efficient thing you might think about is giving every plant you can the 6 yield from cocoa;
what most players do after learning how to swab is one of two things:
- They either only use one swab, to transmit potency or yield or whatever else, and hope that it will be the one that works
- They start using an arbitrary number of swabs to increase their chances through numbers (see section above)
While the second choice isn't exactly wrong, you have to remember that there are only 30 DiseaseSwab in a swab box, 1 swab box in a Nutrimax, and 1 box for each LockerBotanist on station
It's not an item you might encounter a drought of very often, but it's still best to keep in mind that it's a finite resource (that most people wouldn't go to great lengths to replace)
A second, much more important point that I make is the following:

(ignoring how we're swabbing 3 corn plants instead of 1 to then clip it) if you have to swab multiple plants to have more produce with fewer harvests, it's a gigantic fucking chore having to swab multiple plants 4 to 5 times each, one at a time
Here I present to you the humble ClothingBackpackDuffelHydroponics (2 in each HyDrobe):

Instead of using multiple swabs with just 1 cocoa plant, you only use 1 swab with multiple cocoa plants:
- at the start of the shift you plant 1 or 2 cocoa plants (preferrably near the seed extractor)
- you fill a ClothingBackpackDuffelHydroponics with all of them (any excess is still welcome)
- whenever you want to give 6 yield to a plant (or multiple) you do this little dance down below:

using 4-5 cocoa seeds for each plant, you switch the concept of "clean" and "used" from the swabs to the seeds
The exact succession of events is this:
⬇️ you put nearby 4-5 seeds per each plant to give 6 yield to
⬇️ you plant 1 cocoa seed per each plant to give 6 yield to
⬇️ you use the swab on a cocoa plant, then on the plant to give 6 yield to, then on another cocoa plant, then on another plant to give 6 yield to, and so on until you've done each plant
⬇️ you kill all of the cocoa plants
🔄️ you repeat from the start
Warnings for Seed Extraction
| Seed Extractor | VS | Plant Clippers |
As a rule of thumb, only resort to the Seed Extractor when you're completely sure that the plant can produce seeds; every tool that isn't one of the 4 basic ones could lead to making the plant gain the Seedless gene
For nearly every situation in which I need to have a plant's seeds, I use the plant clippers to always keep a backup of the plant; if no backup is taken and the plant dies, the problem varies based on how you handled the plant:
- Was it a normal plant that you didn't mess about with?
- You're one step closer to having to ask cargo for new seeds, which could take 15 minutes up to the end of the shift.
- Was it a really good mutated plant, or a plant in which you put ungodly amounts of Robust Harvest, or, more in general, a plant that you can't obtain again without spending more time and more resources?
- You likely now realise the mistake you made.
In both of these cases, there is always the possibility that the plant still doesn't have the Seedless gene (in case of the mutation, maybe it gained it and lost it); consider these miracles, a green eye in the sky winking before looking away, and therefore unreliable.
IMPORTANT:
WHEN TO CLIP
🟥 Right after you plant the seed (it won't clip)
🟥 The plant is mature but still without fruit (the plant coming from the seed will start already with very low health)
🟩 The green ("ready for harvest") light is blinking

Notes on clipping:
- clipping a plant decreases its health, and although a plant's health is easy to recover with the right know-how, you never know if you might want to keep the plant living a little while or clip it to death
- every single time you clip a plant, there's a random 3 in 10 chance that the plant won't be able to be clipped again; this makes it possible to always have 1 seed, but you might have to replant and retry if you want more backups
More Advanced Plant Genetics
To do: make a short list about all of the plant's "genes" (and which ones are important)
To do: preface with saying how botany can be problematic because the engine doesn't like how you can produce thousands of the same object in half an hour (example being the Bioluminescence mutation)
Mutations and their related chemicals
To do: make a short list about most mutations (and which ones are important)
To do: talk about mutations transform plants in other ones, link the seeds.yml with mutationPrototypes
Mutagen
To do: talk about composting and how it affects random ticks for some mutations (e.g. kudzu and death gene's effects acceleration, gas exhuding)
To do: talk about how plants that have had genes modified, keep all of those modifications when they transform into other plants through mutation (e.g. giving ambrosia vulgaris 6 yield before mutating into ambrosia deus will get deus with 6 yield + omnizine)
Left-4-Zed
Phalanximine
Dylovene, Cryoxadone, Necrosol?
Template:Reagent card Template:Reagent card Template:Reagent card
Sedin?
Perfect Preparation 🌿
To do: round start, plant 1 or 2 cocoa, fill up a duffel, give the cocoa plant(s) 15u of Robust Harvest to get to 46 potency; get a bucket, put 1u of radium from the ChemistryKit, put every EZ Nutrient in the Nutrimax, find any more EZ Nutrient the station might have nearby (Fland has 2 Hydro Equipment Crates) to add; find a screwdriver and wirecutters and cut the Manager wire on the Nutrimax to get the 30u bottle of Mutagen and the 30u bottle of Left-4-Zed; blitz mutating; the importance of Phalanx in this case
To do: talk about composting produce with high potency and how it affects both the Nutriment of a tray and the plant's health
References
- Map layouts were taken using https://map.spacestation14.com/ and https://mapserver.spacestation14.com/api/Image/grid
- Through this API: https://www.postman.com/juliangiebel/ss14-mapserver/request/qgje53r/get-map-map-guid
- Shots of performing tasks were done with a localhost server through the steps in https://docs.spacestation14.com/en/general-development/setup/server-hosting-tutorial.html, using ShareX as the capture software for the gifs
Botanist | 553H

<references/>
Signed User:Pissachu (talk)